Photoshop为草地美女调出唯美的暖黄色
平面设计 发布日期:2026/7/1 浏览次数:1
正在浏览:Photoshop为草地美女调出唯美的暖黄色
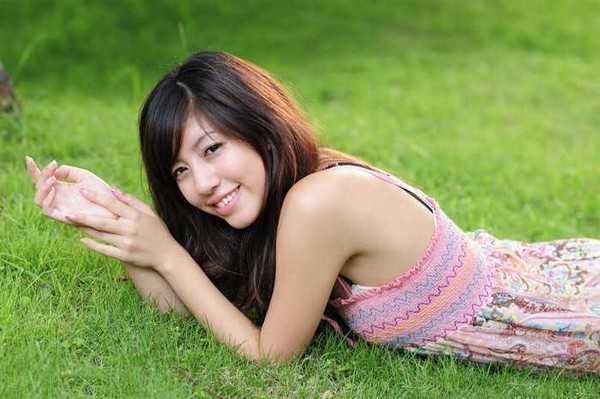
原图
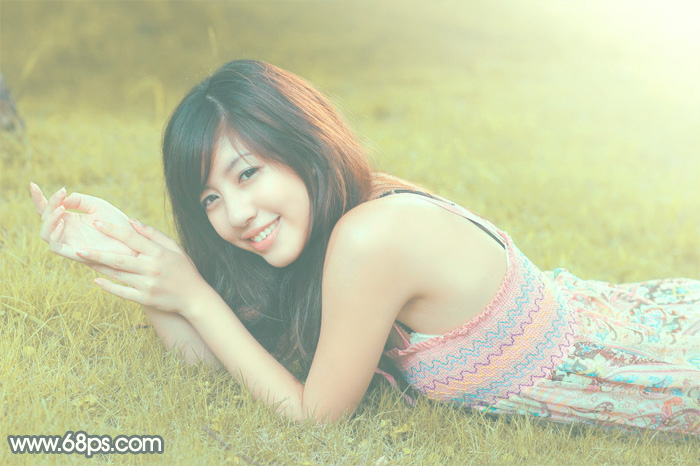
最终效果
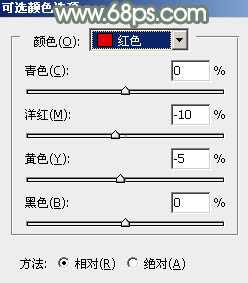
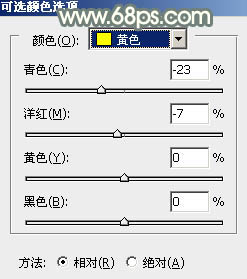
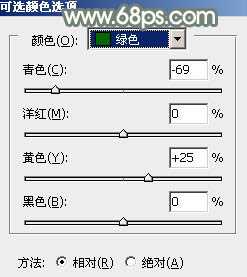
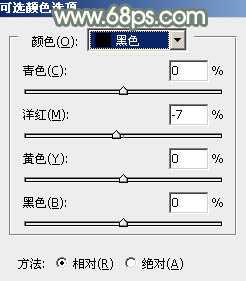
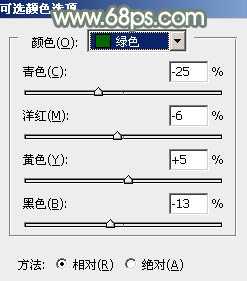
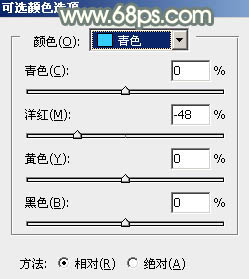
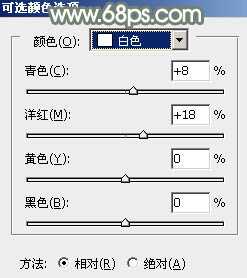
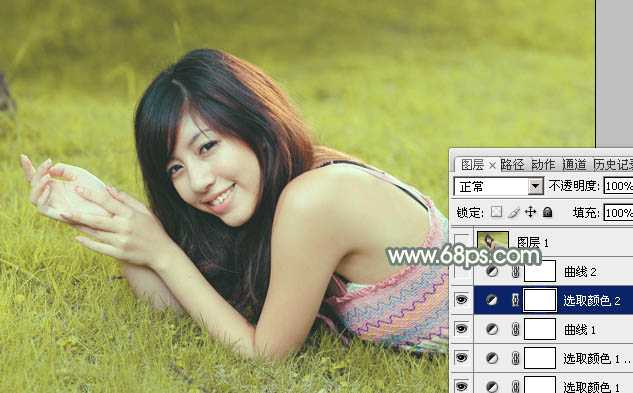
1、打开素材图片,创建可选颜色调整图层,对红、黄、绿、白、黑进行调整,参数设置如图1 - 5,效果如图6。这一步把绿色草地转为黄绿色。
<图1>
<图2>
<图3>

<图4>
<图5>
<图6>
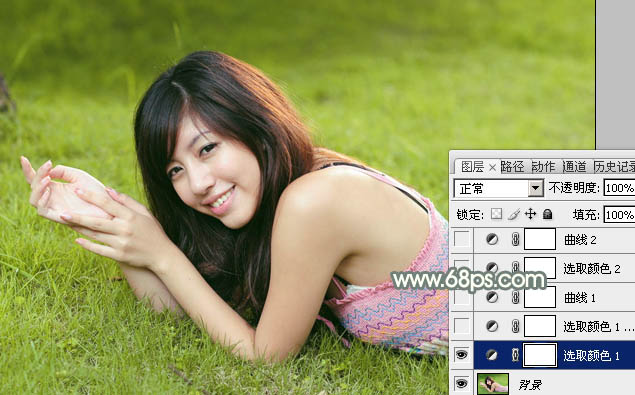
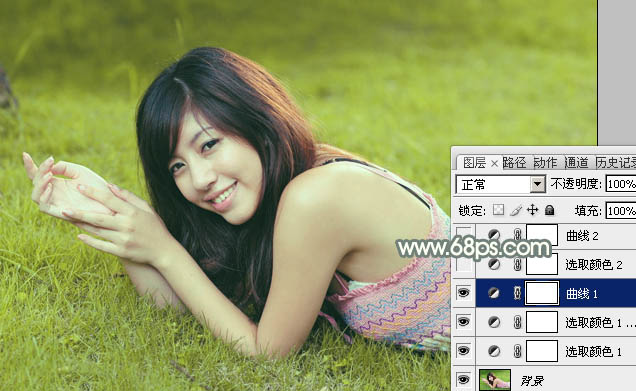
2、按Ctrl + J 把当前可选颜色调整图层复制一层,效果如下图。

<图7>
3、创建曲线调整图层,对红,蓝通道进行调整,参数及效果如下图。这一步简单压暗图片高光部分的颜色。
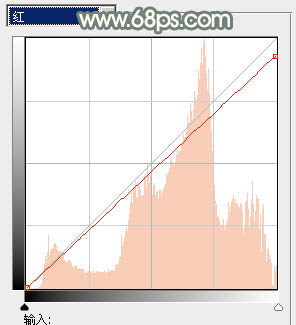
<图8>
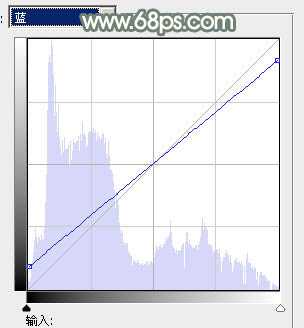
<图9>
<图10>
4、创建可选颜色调整图层,对红、黄、绿、青、白、黑进行调整,参数设置如图11 - 16,效果如图17。这一步简单把图片中的黄绿色提亮,并加强高光及暗部颜色。
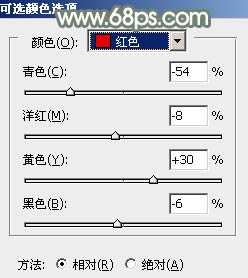
<图11>
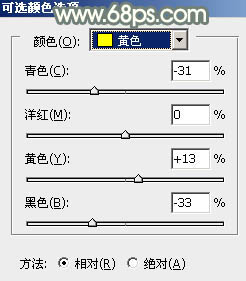
<图12>
<图13>
<图14>
<图15>

<图16>
<图17>
5、创建曲线调整图层,对RGB、红、绿、蓝通道进行调整,参数设置如图18 - 21,效果如图22。这一步给图片高光部分增加淡黄色。
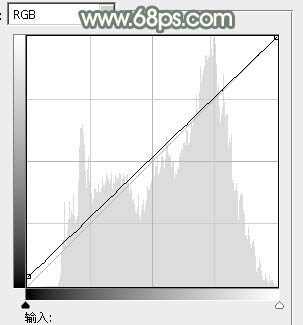
<图18>
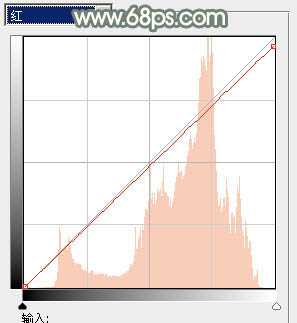
<图19>
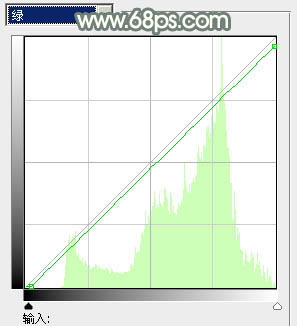
<图20>
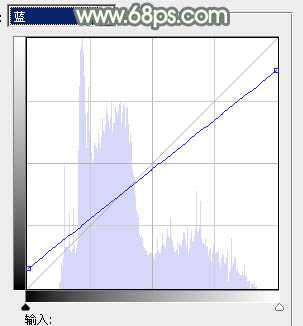
<图21>
<图22>
上一页12 下一页 阅读全文
最终效果
1、打开素材图片,创建可选颜色调整图层,对红、黄、绿、白、黑进行调整,参数设置如图1 - 5,效果如图6。这一步把绿色草地转为黄绿色。
<图1>
<图2>
<图3>
<图4>
<图5>
<图6>
2、按Ctrl + J 把当前可选颜色调整图层复制一层,效果如下图。
<图7>
3、创建曲线调整图层,对红,蓝通道进行调整,参数及效果如下图。这一步简单压暗图片高光部分的颜色。
<图8>
<图9>
<图10>
4、创建可选颜色调整图层,对红、黄、绿、青、白、黑进行调整,参数设置如图11 - 16,效果如图17。这一步简单把图片中的黄绿色提亮,并加强高光及暗部颜色。
<图11>
<图12>
<图13>
<图14>
<图15>
<图16>
<图17>
5、创建曲线调整图层,对RGB、红、绿、蓝通道进行调整,参数设置如图18 - 21,效果如图22。这一步给图片高光部分增加淡黄色。
<图18>
<图19>
<图20>
<图21>
<图22>
上一页12 下一页 阅读全文