用Photoshop制作灰色的球体
平面设计 发布日期:2026/3/5 浏览次数:1
正在浏览:用Photoshop制作灰色的球体
Photoshop软件使用的多了就会越来越熟练,做出来的图片也会越来越好。这篇教程是向的朋友介绍用Photoshop制作灰色的球体方法,喜欢的朋友快快来学习吧!
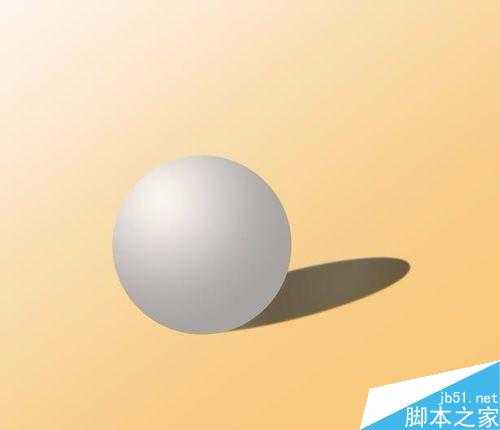
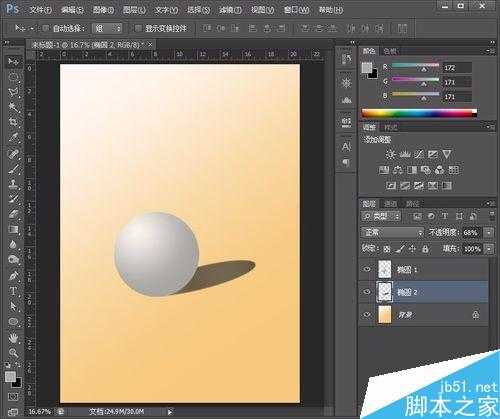
球体图片最终效果图:
方法/步骤
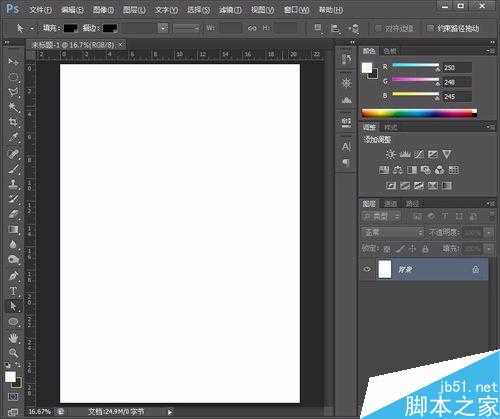
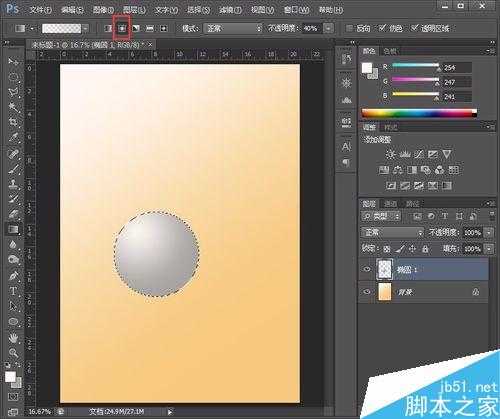
Photoshop软件中新建空白画布。
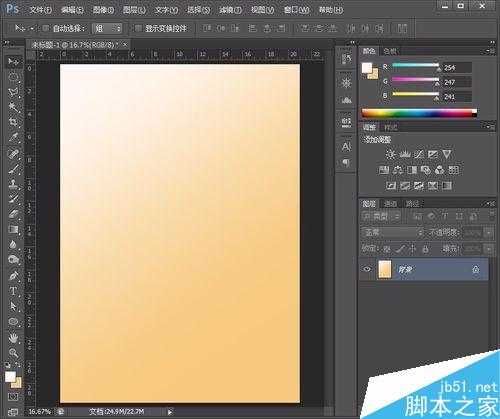
画布填充一个黄白渐变色背景。
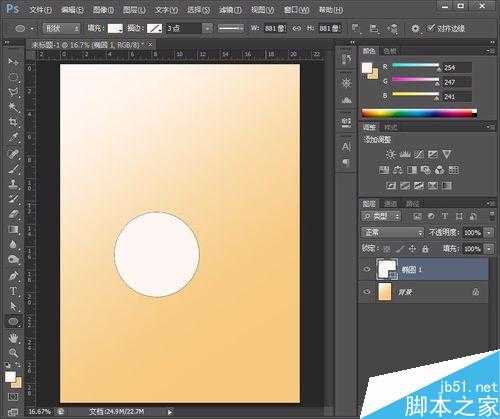
用圆形工具画一个正圆。
用白灰渐变色填充正圆,填充样式要选择第二个。
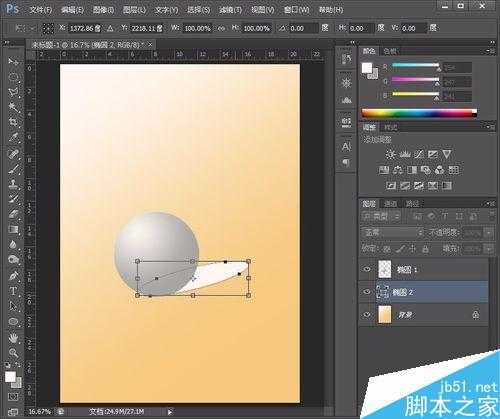
用路径工具制作影子,需要用到斜切变换。
影子填充灰黑颜色,利用透明度调整影子效果。好了,完成了。

以上就是用Photoshop制作灰色的球体方法介绍,操作很简单的,大家学会了吗?希望大家喜欢这篇文章!
相关阅读:用Photoshop制作超逼真的圆柱体