Photoshop制作大气的PS立体字海报
平面设计 发布日期:2026/3/5 浏览次数:1
正在浏览:Photoshop制作大气的PS立体字海报
立体很容易做好,不过要能与场景完美融合,还需要一些特殊处理。如下面的教程:立体字做好后,作者根据背景、光源、质感等重新给立体字的各个面进行细化处理,出来的效果非常整体,细腻。
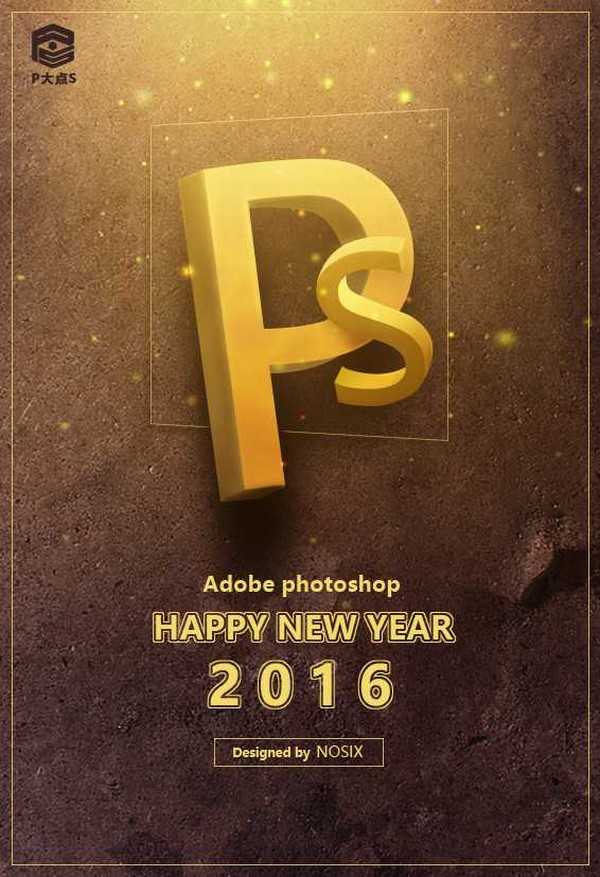
最终效果
1、这里的逻辑是,先得到一个符合透视原理的3D文字轮廓然后放到photoshop中添加贴图和效果,做成艺术化的伪3D视觉。得到3D轮廓的方法很多,比如绘画基础好的同学可以自行手绘。
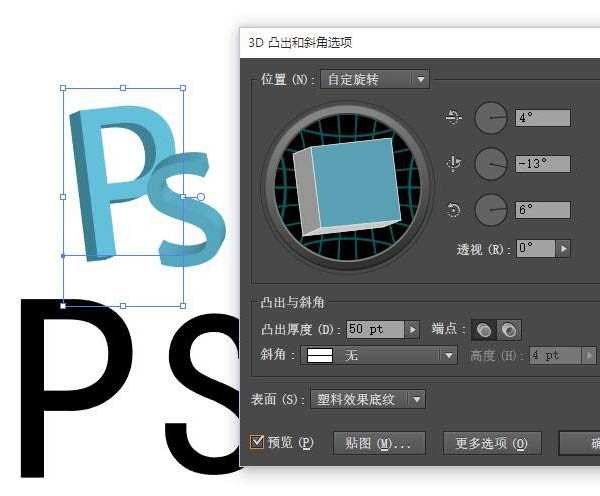
利用AI中的3D效果:

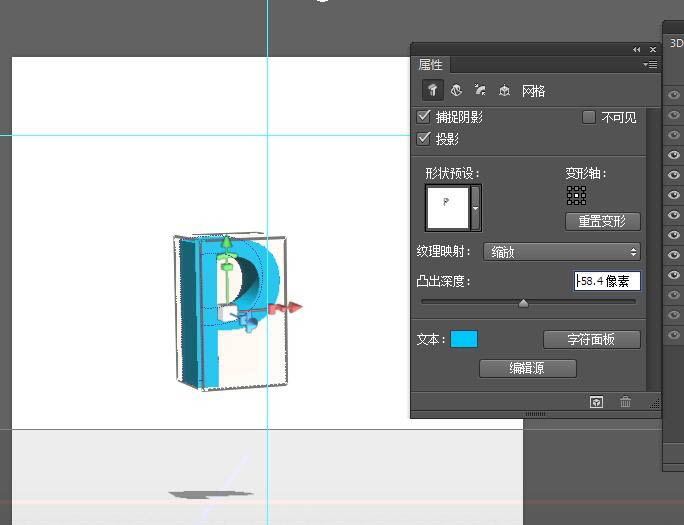
Photoshop中的3D工具:
得到3D文字的方法很多,随你喜欢。
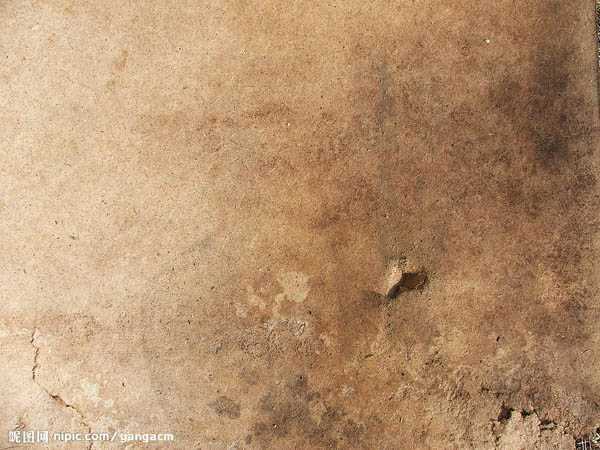
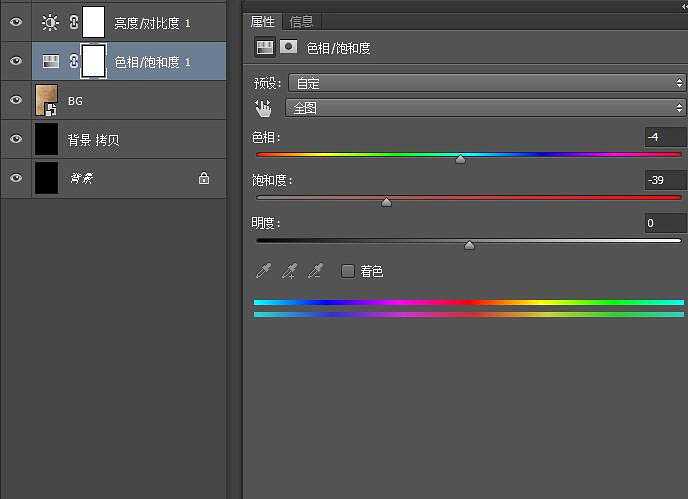
2、得到3D文字的轮廓我们就可以开始进入到本教程的核心的图片合成环节了。 建立背景。新建合适大小的画布,置入背景素材。对素材调色,把它尽量压暗,提高对比度。

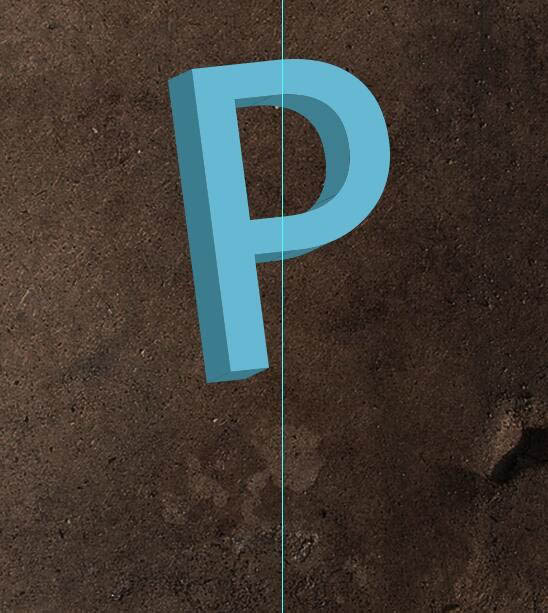
3、制作文字,这里以字母“P”为例子。将AI中制作好的文字复制粘贴到Photoshop中,并调整好大小和位置。
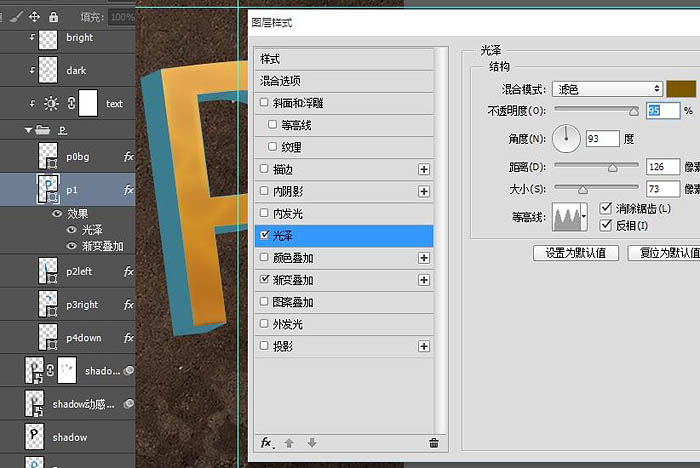
4、用钢笔勾出3D文字的各个里面区域,施加图层样式得到基础质感。
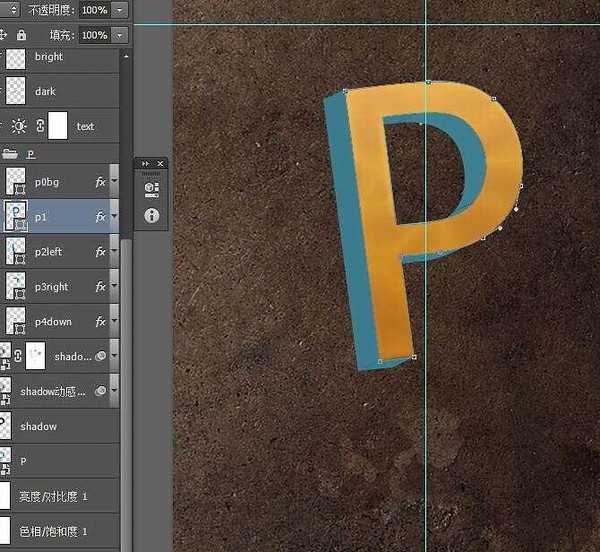
5、效果如图。
6、其余的几个区域也进行一样的操作。但是图层演示要根据实际情况做相应调整。
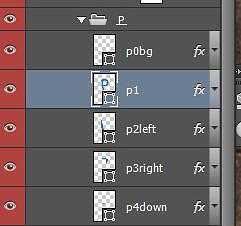
7、根据轮廓用钢笔绘出3D文字,并用图层样式赋予其基础质感。注意,这里用形状图层并且用图层样式来进行调节是因为这里的属性是可以随时修改的。我想对于GUI或者icon设计的朋友,应该很清楚。
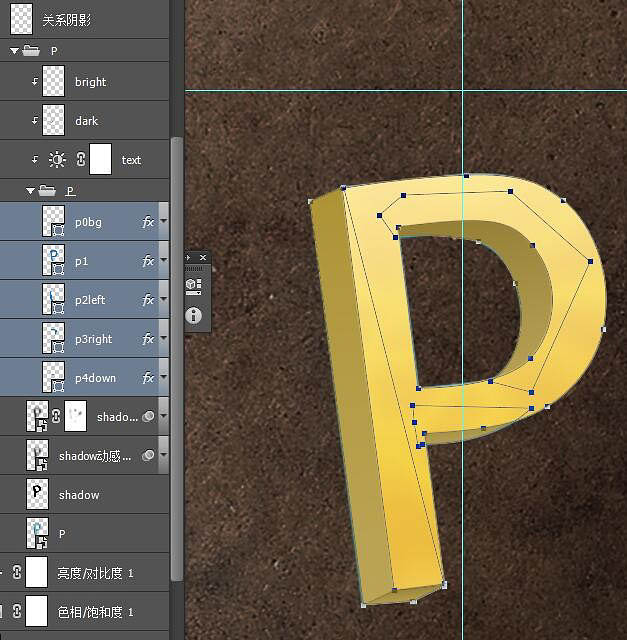
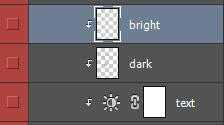
8、用剪贴蒙版对文字进行进一步修饰处理。 添加一个亮度对比度的调整图层,将整体亮度压低,新建一层高光层混合模式为线性减淡,一层暗部层混合模式为正片叠底。亮部层中用合适的柔角画笔,调整好流量和透明度,吸取一个亮黄色在收光面上画出淡淡的高光,适当的时候可以用高斯模糊均化一下。暗部层反之,打造阴影区域。
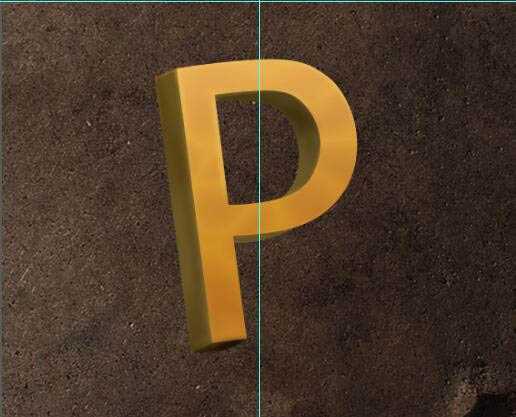
前:

后:
上一页12 下一页 阅读全文
最终效果
1、这里的逻辑是,先得到一个符合透视原理的3D文字轮廓然后放到photoshop中添加贴图和效果,做成艺术化的伪3D视觉。得到3D轮廓的方法很多,比如绘画基础好的同学可以自行手绘。
利用AI中的3D效果:
Photoshop中的3D工具:
得到3D文字的方法很多,随你喜欢。
2、得到3D文字的轮廓我们就可以开始进入到本教程的核心的图片合成环节了。 建立背景。新建合适大小的画布,置入背景素材。对素材调色,把它尽量压暗,提高对比度。
3、制作文字,这里以字母“P”为例子。将AI中制作好的文字复制粘贴到Photoshop中,并调整好大小和位置。
4、用钢笔勾出3D文字的各个里面区域,施加图层样式得到基础质感。
5、效果如图。
6、其余的几个区域也进行一样的操作。但是图层演示要根据实际情况做相应调整。
7、根据轮廓用钢笔绘出3D文字,并用图层样式赋予其基础质感。注意,这里用形状图层并且用图层样式来进行调节是因为这里的属性是可以随时修改的。我想对于GUI或者icon设计的朋友,应该很清楚。
8、用剪贴蒙版对文字进行进一步修饰处理。 添加一个亮度对比度的调整图层,将整体亮度压低,新建一层高光层混合模式为线性减淡,一层暗部层混合模式为正片叠底。亮部层中用合适的柔角画笔,调整好流量和透明度,吸取一个亮黄色在收光面上画出淡淡的高光,适当的时候可以用高斯模糊均化一下。暗部层反之,打造阴影区域。
前:
后:
上一页12 下一页 阅读全文
上一篇:ps制作一个漂亮的鲜花相框
下一篇:ps制作可口的心形巧克力教程