Photoshop设计绚丽的光线吉他壁纸效果
平面设计 发布日期:2026/3/5 浏览次数:1
正在浏览:Photoshop设计绚丽的光线吉他壁纸效果
本教程主要使用Photoshop设计紫色光线效果的吉他桌面壁纸,光影壁纸的制作比较讲究。首先需要构思好大致的画面。然后就是用钢笔工具勾图,为了增强光影效果,可以适当的给图形加上一些发光样式。创意需要自己去发挥。
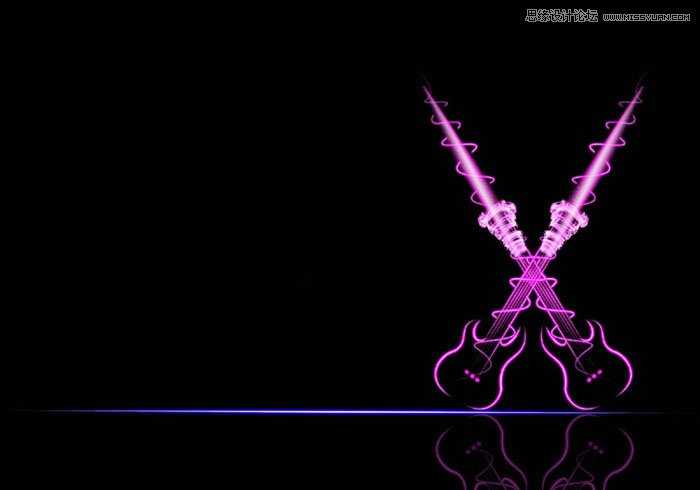
最终效果1
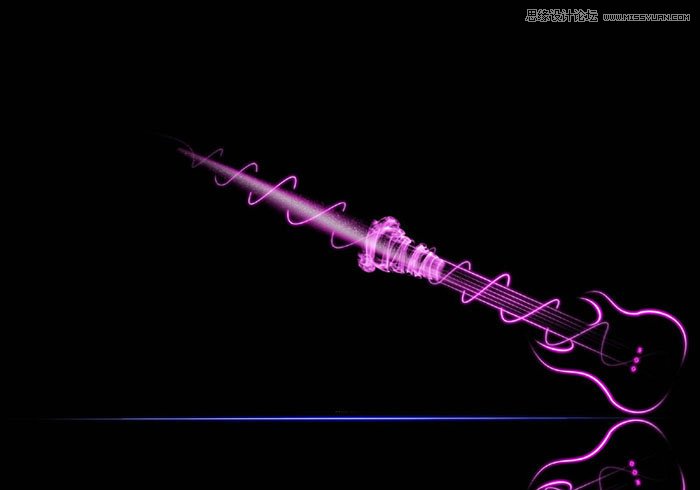
最终效果2
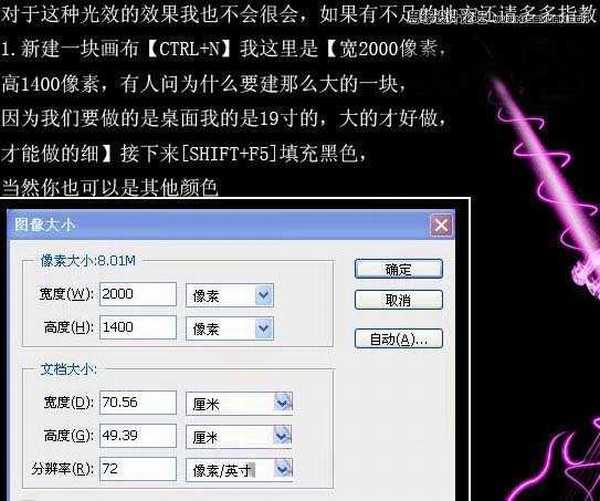
1、新建一块画布,CTRL+N。我这里是2000*1400像素。
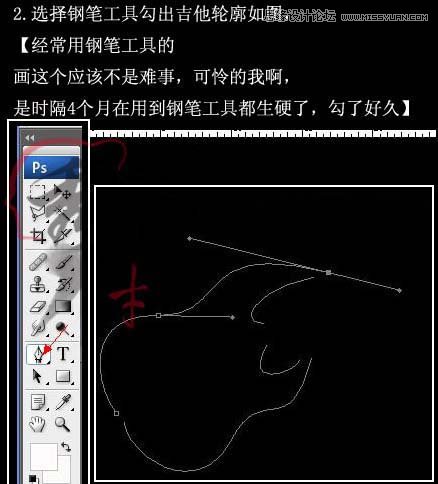
2、选择钢笔工具,画出贝斯轮廓,和转手绘差不多。
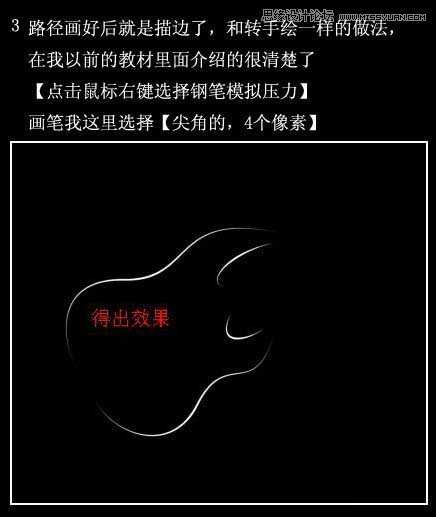
3、路径画好后就是描边,和转手绘一样的做法,在我以前的教材里面介绍的很清楚了(点击鼠标右键选择画笔描边,勾选模拟压力)。画笔我这里选择尖角,4像素大小。
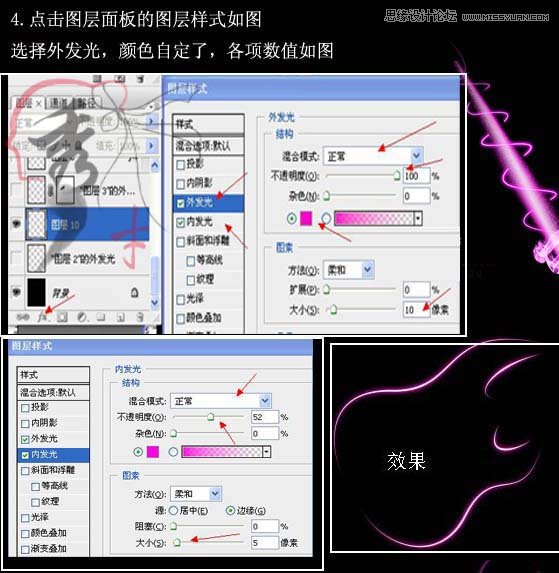
4、点击图层样式,里面的内发光和外发光,接下来的发光也都是一样的设置,所以就不在截图了。
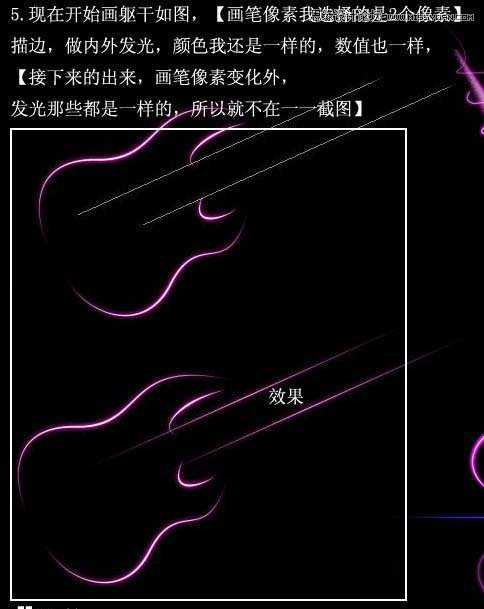
5、画贝斯干轮廓,描边做内外发光。
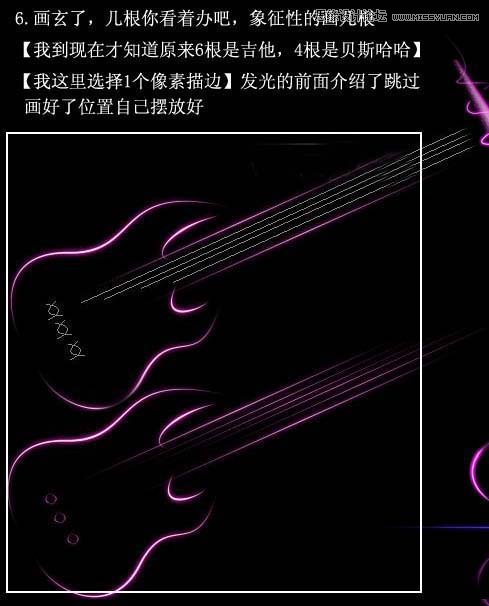
6、画玄,我选择的是一个像素因为你玄不可能太粗。
最终效果1
最终效果2
1、新建一块画布,CTRL+N。我这里是2000*1400像素。
2、选择钢笔工具,画出贝斯轮廓,和转手绘差不多。
3、路径画好后就是描边,和转手绘一样的做法,在我以前的教材里面介绍的很清楚了(点击鼠标右键选择画笔描边,勾选模拟压力)。画笔我这里选择尖角,4像素大小。
4、点击图层样式,里面的内发光和外发光,接下来的发光也都是一样的设置,所以就不在截图了。
5、画贝斯干轮廓,描边做内外发光。
6、画玄,我选择的是一个像素因为你玄不可能太粗。