Photoshop制作绚丽的彩色光线效果图
平面设计 发布日期:2026/3/5 浏览次数:1
正在浏览:Photoshop制作绚丽的彩色光线效果图
本教程适合初学者,我包括创建新画笔预设和钢笔工具的使用方法。你将有更多的机会实践图层混合模式,滤镜和自由变换工具。试试看!
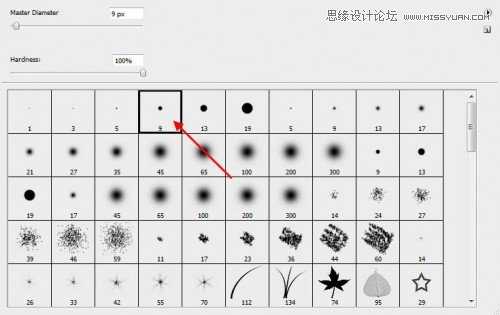
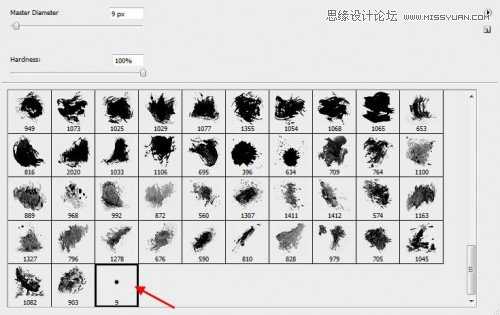
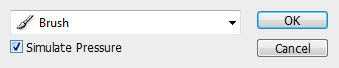
创建一个新的文档,填充黑色背景,宽高,设置为980*400px,然后你可以更改这一设置,使用72 pixel/inch 因为创建的图像是网页所用的。现在,我创建一个笔刷预设,这样做,第一步选择笔刷工具,从下面的一些笔刷中,
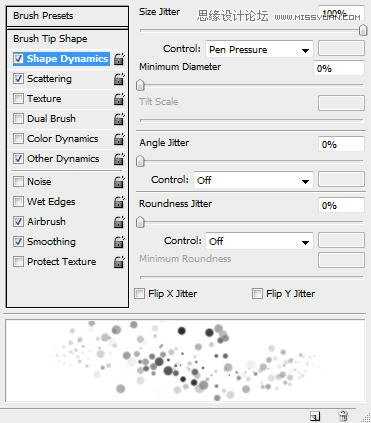
形状动态
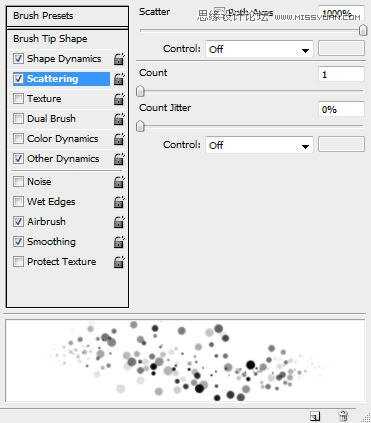

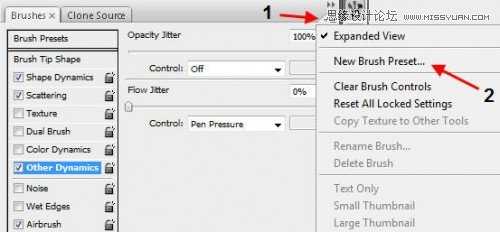
在完成这个画笔的设置之后,我们保存它,让它作为新的画笔,这样以后我们还可以使用它,点击左下角的三右上方点击“新建画笔预设”。

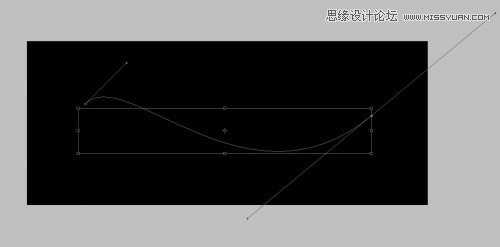
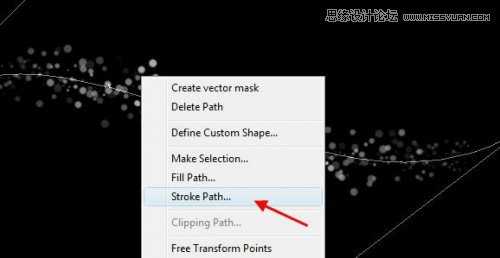
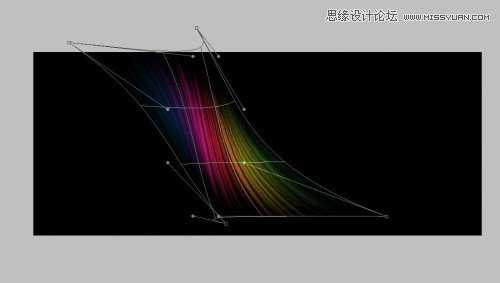
然后右键单击“描边路径”

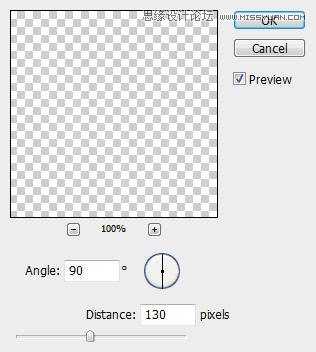
仍然在这个层“lines”,选择“滤镜“-”模糊“-”动态模糊“命令,然后设置如下的的参数。

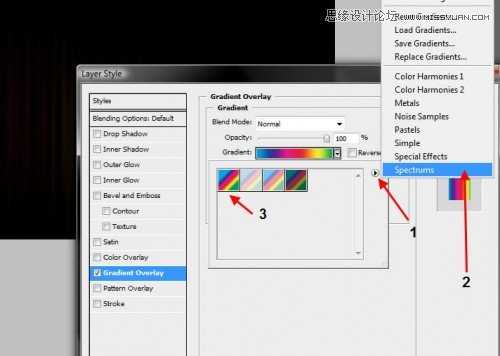

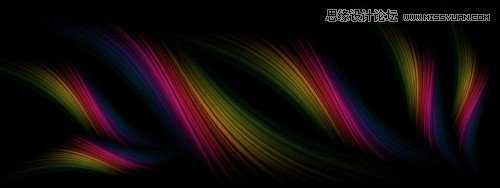
我们又一次重复的“lines”层的3倍,你将看到的频谱变得更清晰的颜色:

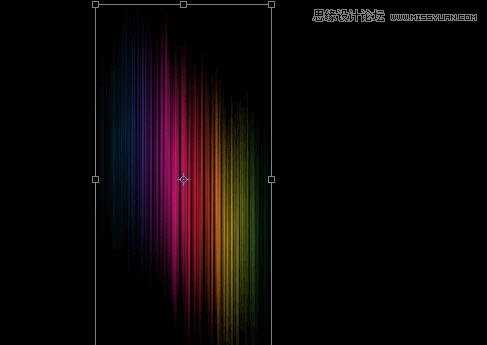

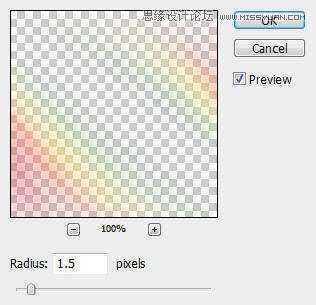
我们还可以加一点的谱线的环境影响色。要做到这一点,简单重复的合并层和应用如下设置高斯模糊(滤镜>模糊>:高斯模糊)
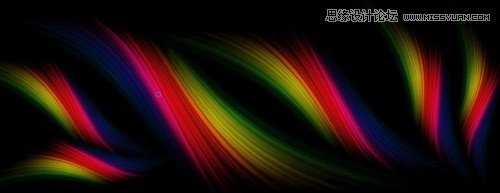

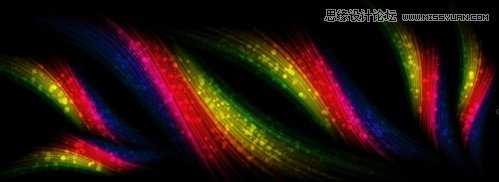
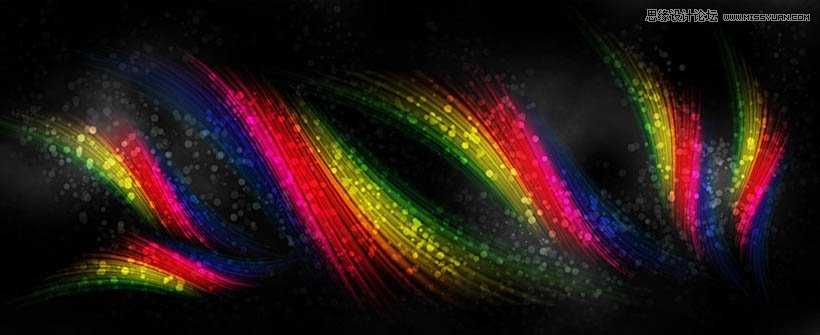
这里是这个教程的最后版本(加了点云的影响和锐化图像):
创建一个新的文档,填充黑色背景,宽高,设置为980*400px,然后你可以更改这一设置,使用72 pixel/inch 因为创建的图像是网页所用的。现在,我创建一个笔刷预设,这样做,第一步选择笔刷工具,从下面的一些笔刷中,
形状动态
在完成这个画笔的设置之后,我们保存它,让它作为新的画笔,这样以后我们还可以使用它,点击左下角的三右上方点击“新建画笔预设”。
然后右键单击“描边路径”
仍然在这个层“lines”,选择“滤镜“-”模糊“-”动态模糊“命令,然后设置如下的的参数。
我们又一次重复的“lines”层的3倍,你将看到的频谱变得更清晰的颜色:
我们还可以加一点的谱线的环境影响色。要做到这一点,简单重复的合并层和应用如下设置高斯模糊(滤镜>模糊>:高斯模糊)
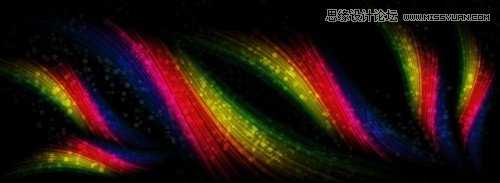
这里是这个教程的最后版本(加了点云的影响和锐化图像):