Photoshop设计打造喜庆的新年木质立体红灯笼
平面设计 发布日期:2026/3/5 浏览次数:1
正在浏览:Photoshop设计打造喜庆的新年木质立体红灯笼
灯笼是比较标准的立体物体,其中局部的构件也是立体的。制作的时候需要先把整体拆分一下,按顺序整理好。然后设定整体光源位置,再逐个刻画即可。
最终效果

1、先来制作灯笼的主体部分,需要完成的效果如下图。

<图1>
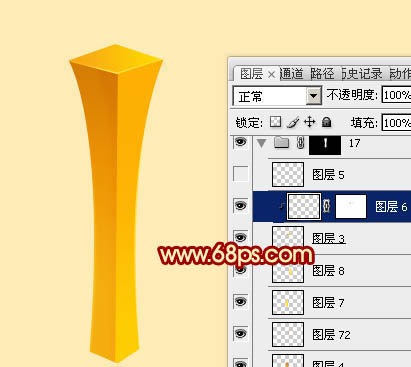
2、新建一个1000 * 800像素的文件,背景填充淡黄色:#FFF0B9。先从木架入手,需要制作4个木架,其中一个只有局部如下图。
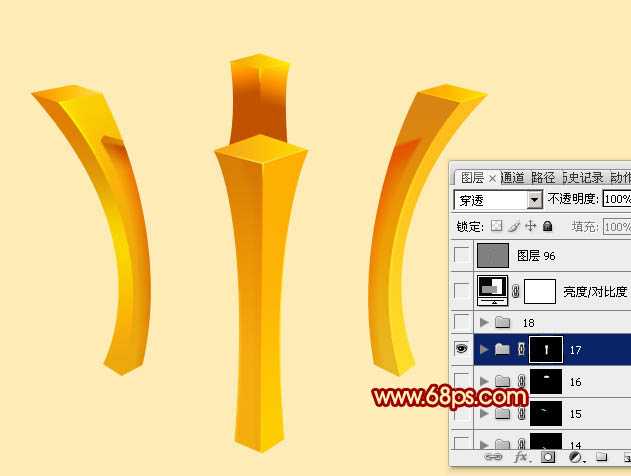
<图2>
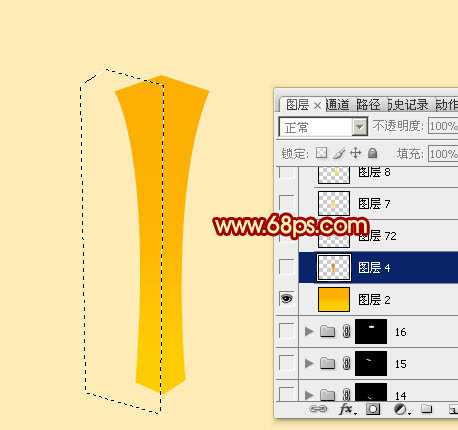
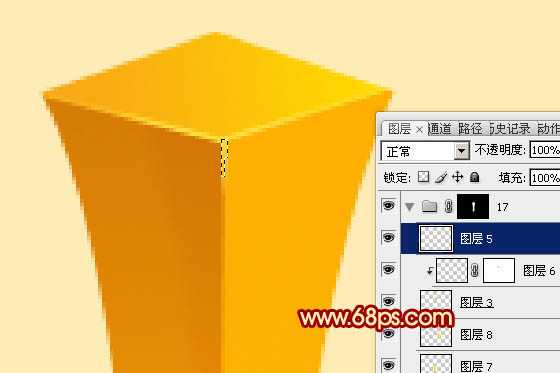
3、先来制作最前面的木架,新建一个组,用钢笔勾出木架的轮廓,转为选区后给组添加图层蒙版,如下图。
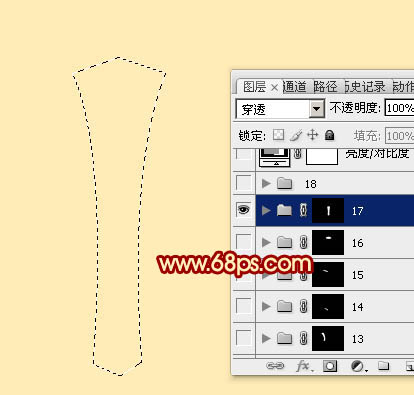
<图3>
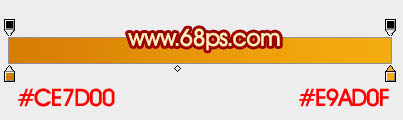
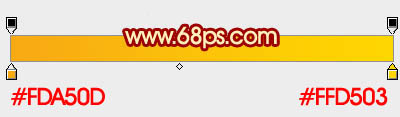
4、在组里新建一个图层,选择渐变工具,颜色设置如图4,由上至下拉出土5所示的线性渐变。
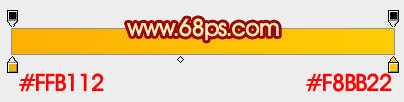
<图4>
<图5>
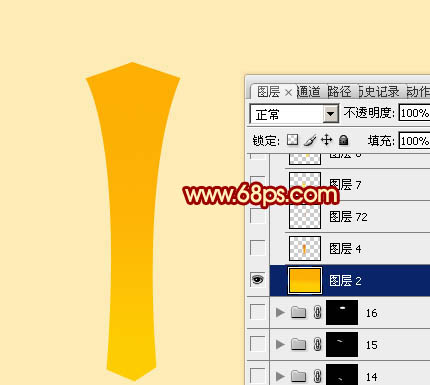
5、新建一个图层,用钢笔勾出左半部分的轮廓,转为选区后拉上土7所示的线性渐变,效果如图8。
<图6>
<图7>
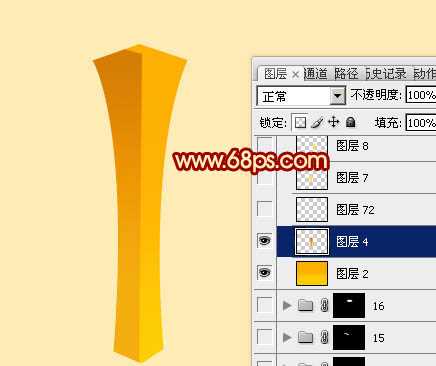
<图8>
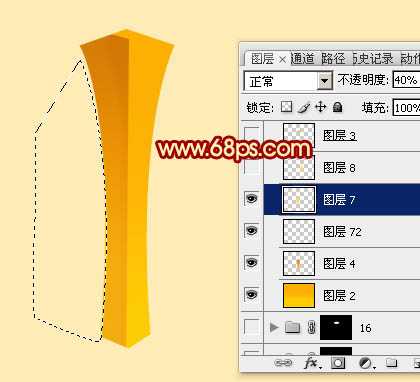
6、用钢笔勾出下图所示的选区,羽化2个像素后按Ctrl + J 复制到新的图层,混合模式改为“正片叠底”,不透明度改为:10%,给边缘增加暗部。
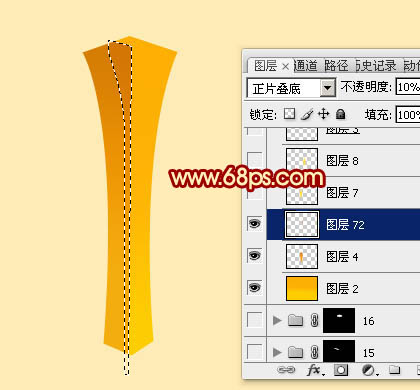
<图9>
7、新建一个图层,用钢笔勾出左侧边缘的高光,羽化1个像素后填充淡黄色。
<图10>
8、新建一个图层,同上的方法给右侧边缘增加高光。
<图11>
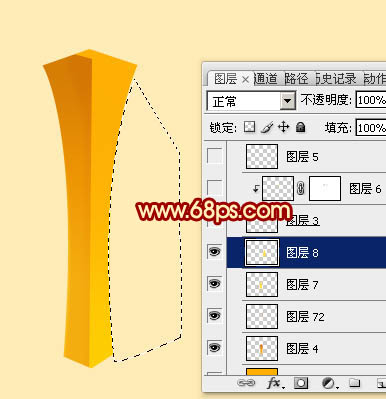
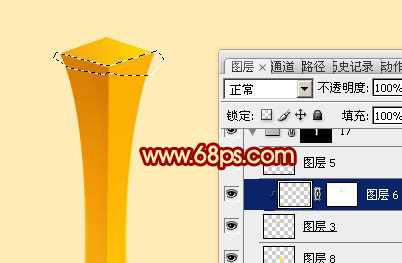
9、新建一个图层,用钢笔勾出顶部面的轮廓,转为选区后加上图13所示的线性渐变。
<图12>
<图13>
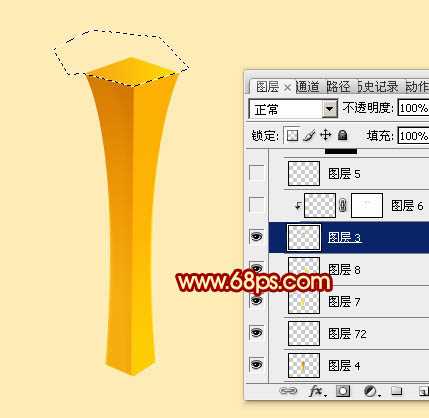
10、新建图层,给边缘交汇处增加高光,如图14 - 16。
<图14>
<图15>
<图16>
上一页12 下一页 阅读全文
最终效果
1、先来制作灯笼的主体部分,需要完成的效果如下图。
<图1>
2、新建一个1000 * 800像素的文件,背景填充淡黄色:#FFF0B9。先从木架入手,需要制作4个木架,其中一个只有局部如下图。
<图2>
3、先来制作最前面的木架,新建一个组,用钢笔勾出木架的轮廓,转为选区后给组添加图层蒙版,如下图。
<图3>
4、在组里新建一个图层,选择渐变工具,颜色设置如图4,由上至下拉出土5所示的线性渐变。
<图4>
<图5>
5、新建一个图层,用钢笔勾出左半部分的轮廓,转为选区后拉上土7所示的线性渐变,效果如图8。
<图6>
<图7>
<图8>
6、用钢笔勾出下图所示的选区,羽化2个像素后按Ctrl + J 复制到新的图层,混合模式改为“正片叠底”,不透明度改为:10%,给边缘增加暗部。
<图9>
7、新建一个图层,用钢笔勾出左侧边缘的高光,羽化1个像素后填充淡黄色。
<图10>
8、新建一个图层,同上的方法给右侧边缘增加高光。
<图11>
9、新建一个图层,用钢笔勾出顶部面的轮廓,转为选区后加上图13所示的线性渐变。
<图12>
<图13>
10、新建图层,给边缘交汇处增加高光,如图14 - 16。
<图14>
<图15>
<图16>
上一页12 下一页 阅读全文