Photoshop设计针织圣诞帽元素字实例教程
平面设计 发布日期:2026/3/5 浏览次数:1
正在浏览:Photoshop设计针织圣诞帽元素字实例教程
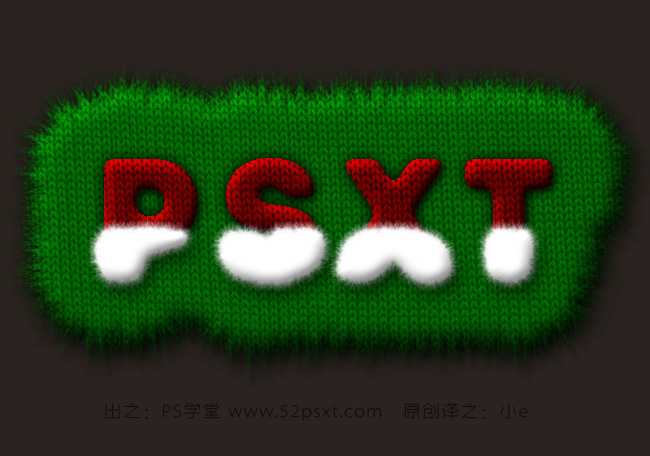
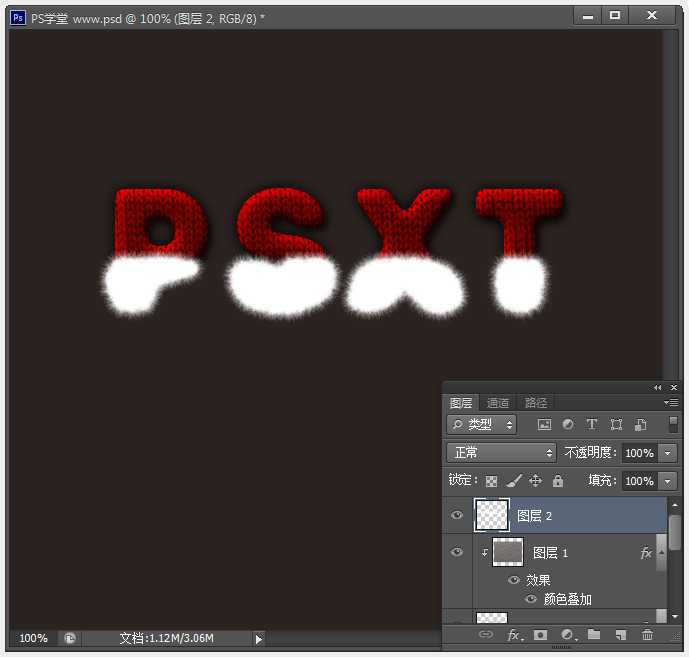
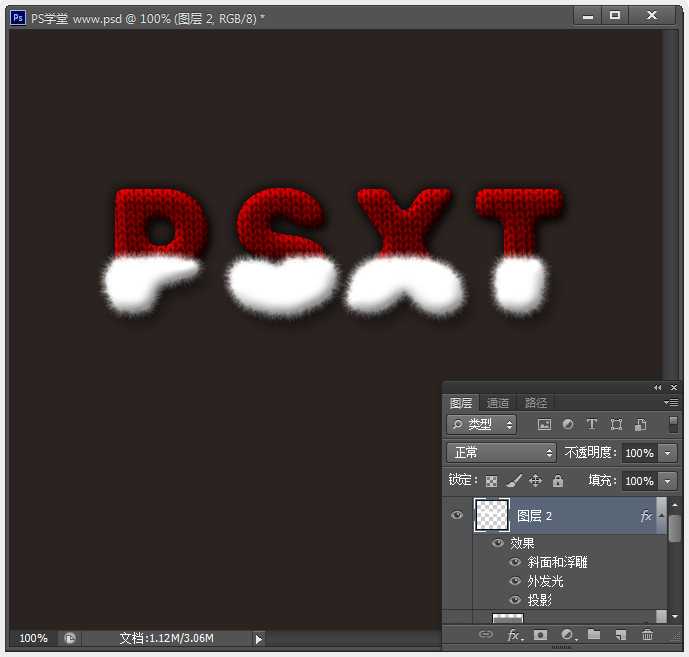
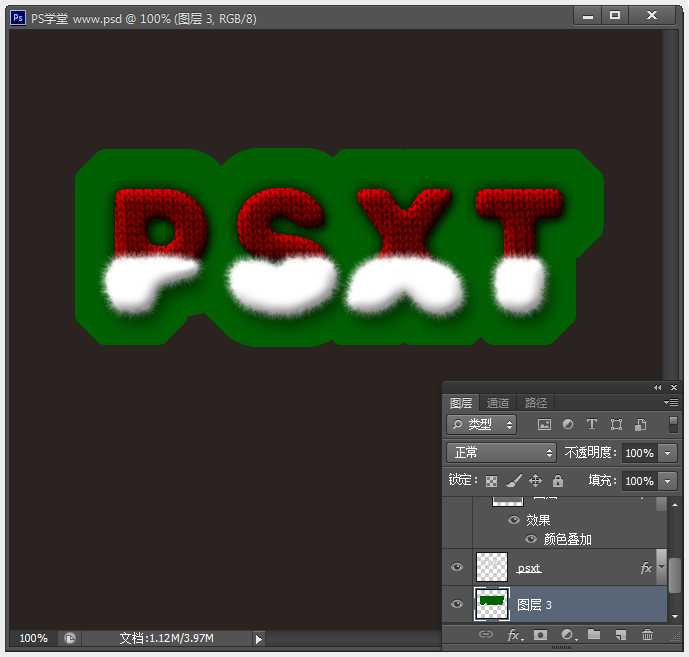
效果:
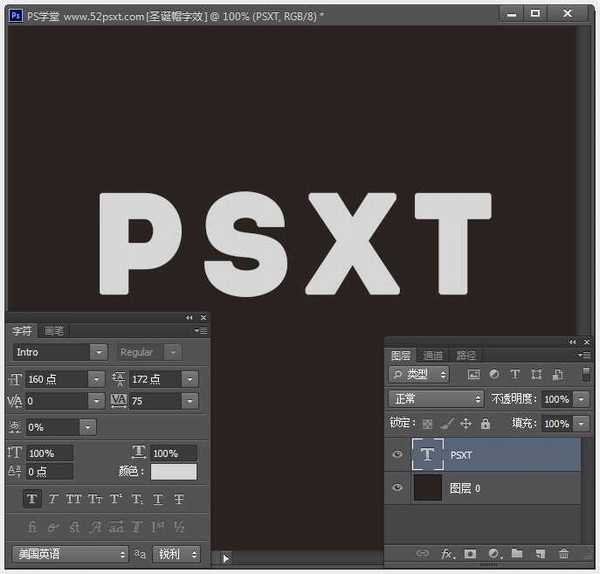
非常常见的大气粗体intro字体
灰色针织线路高清图片
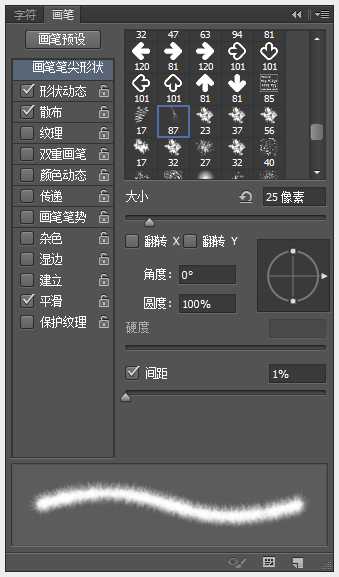
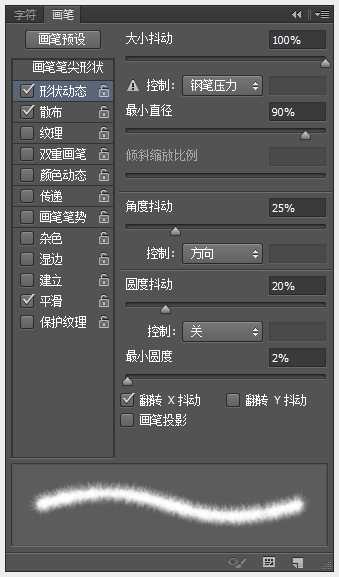
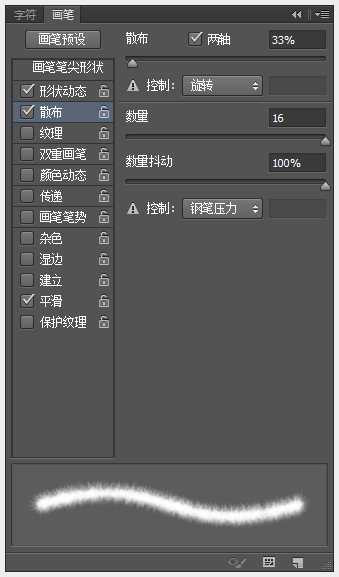
毛绒绒的皮毛发笔刷
教程:
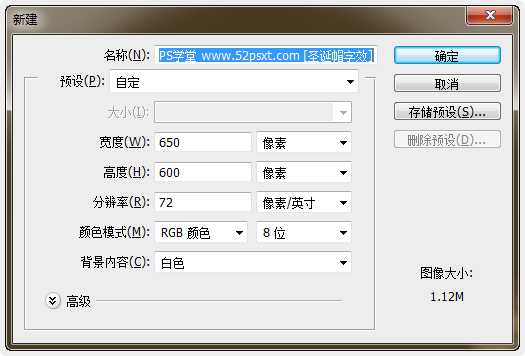
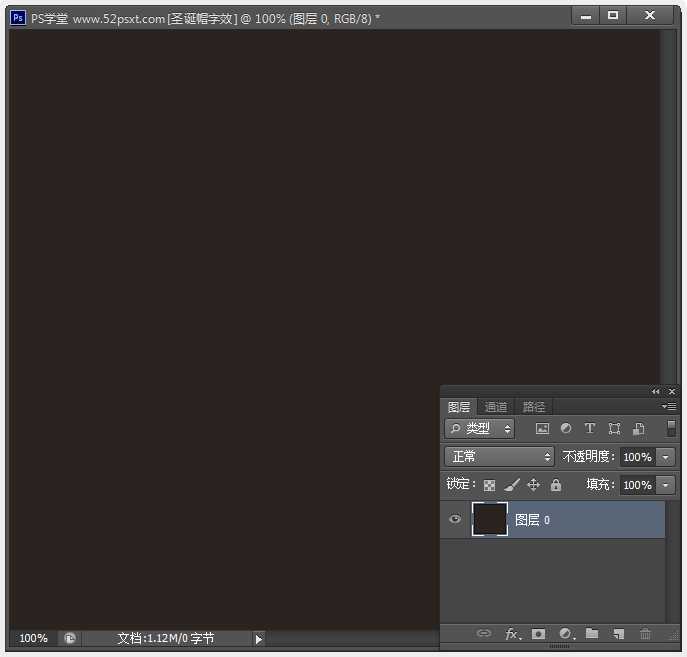
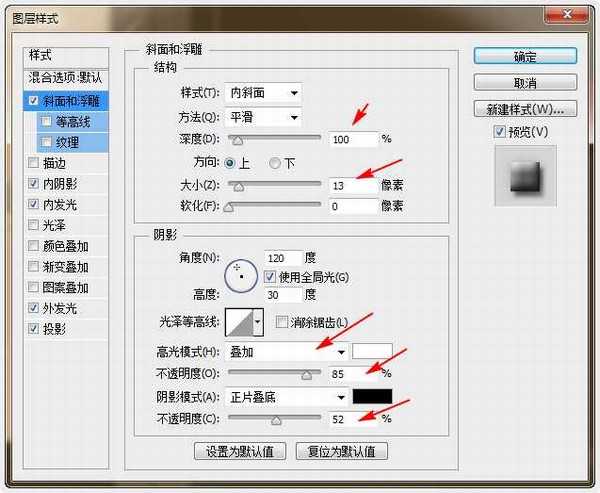
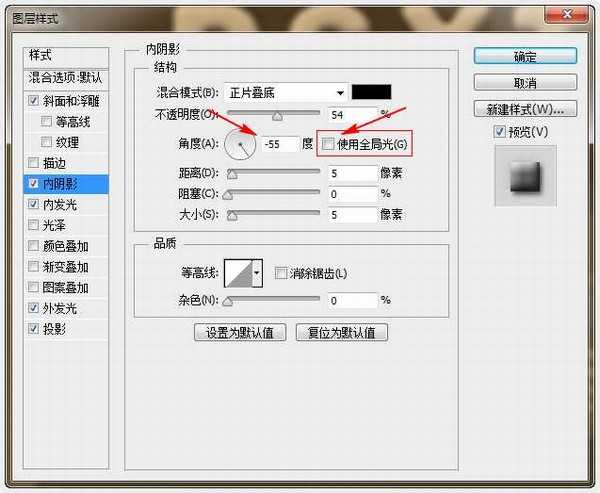
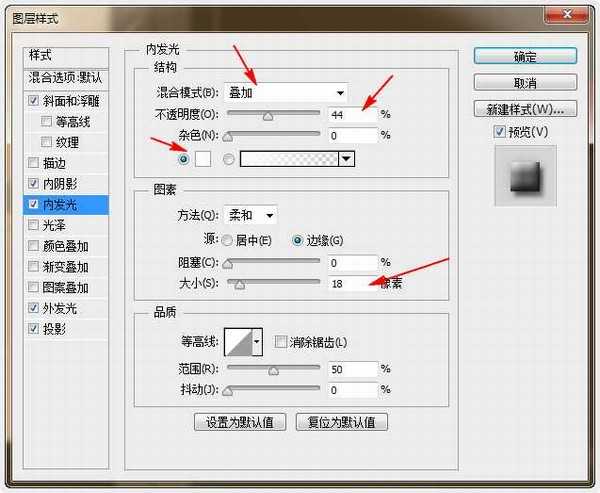
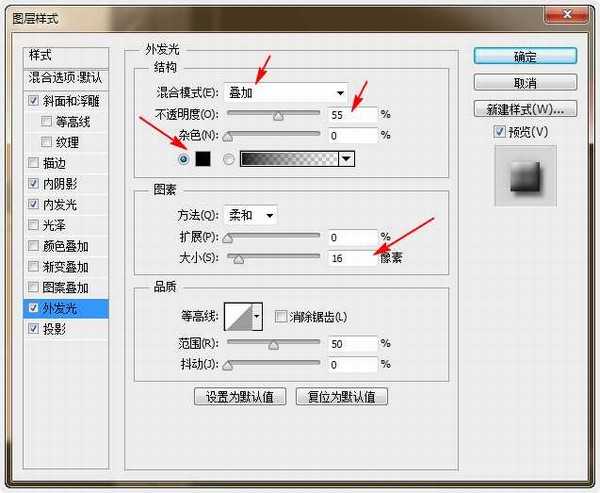
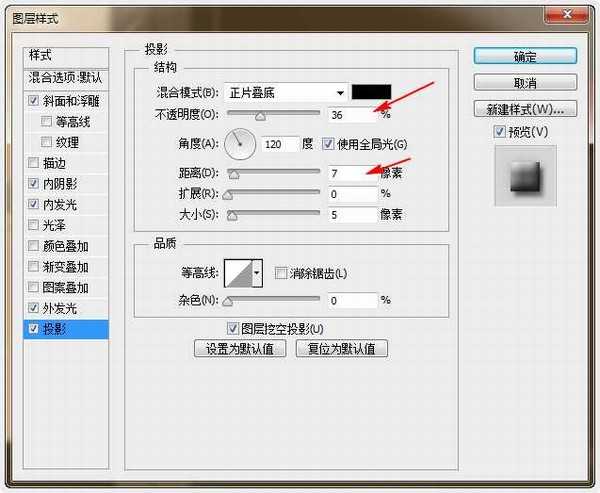
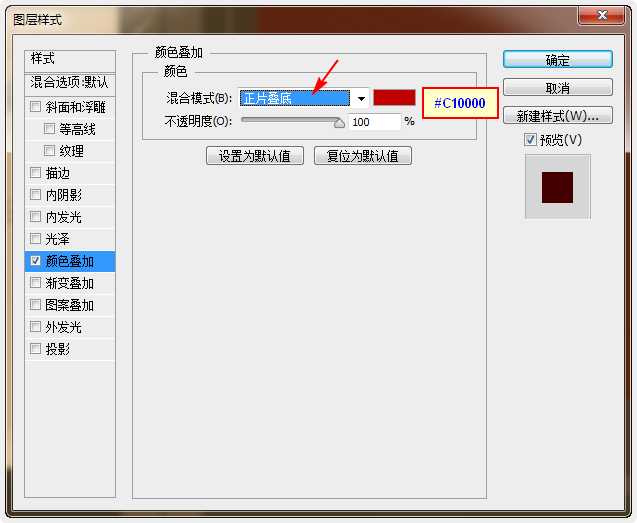
1、新建650*600像素的画布,填充背景颜色:#2B2320,双击背景图层解锁。
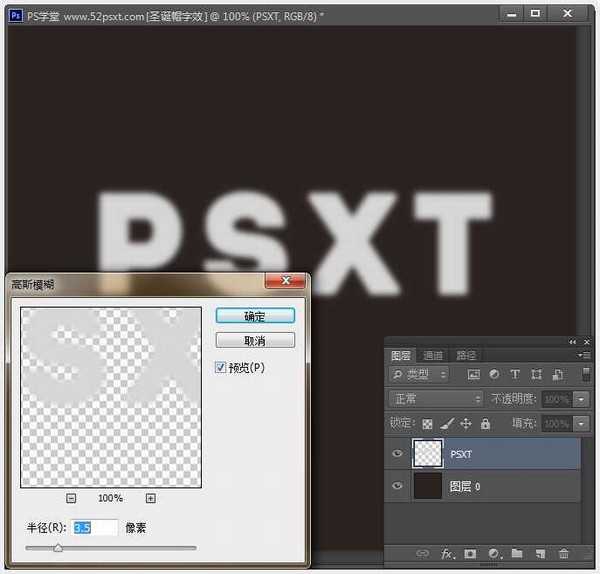
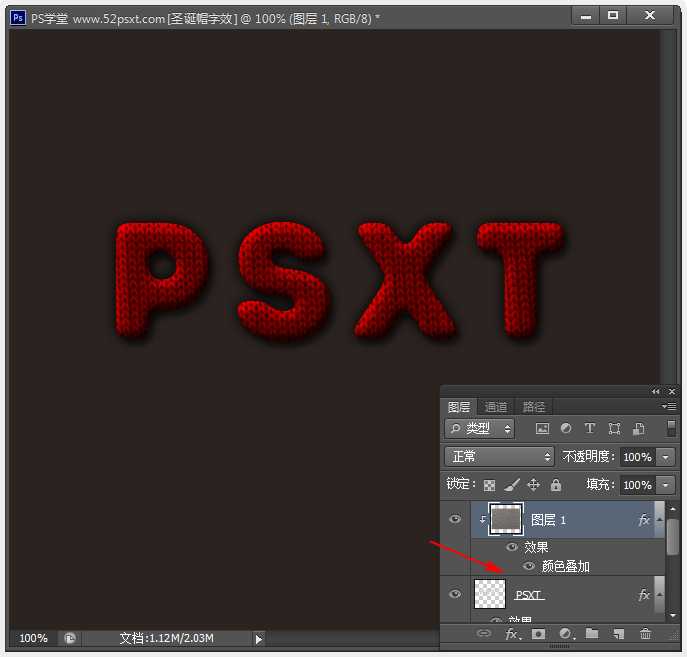
右键文字图层-栅格化文字,执行‘滤镜-模糊-高斯模糊’。
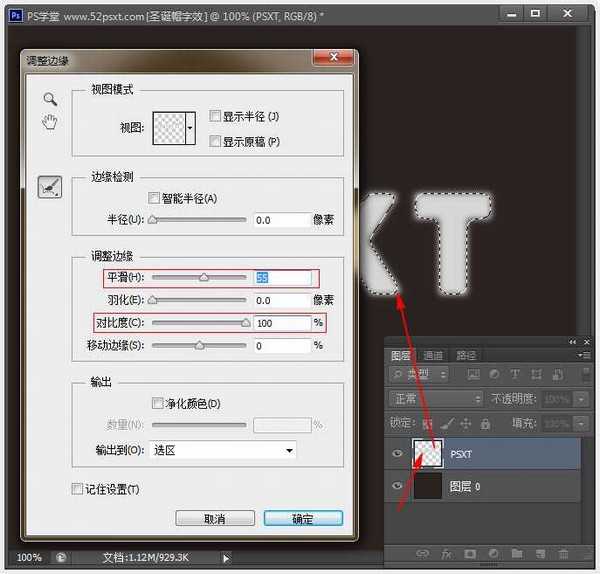
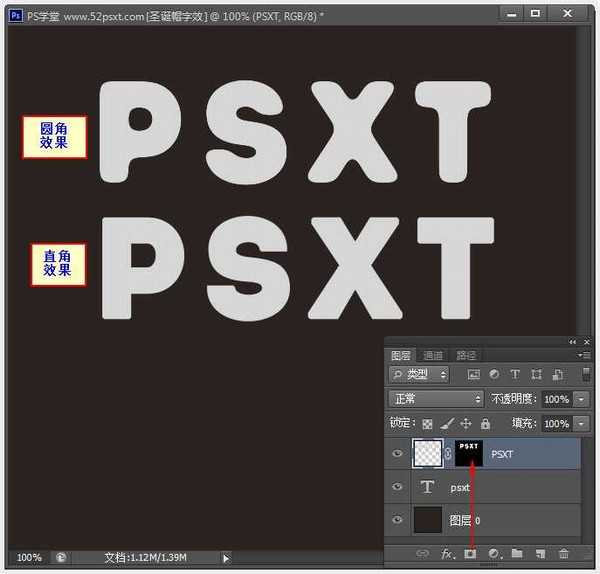
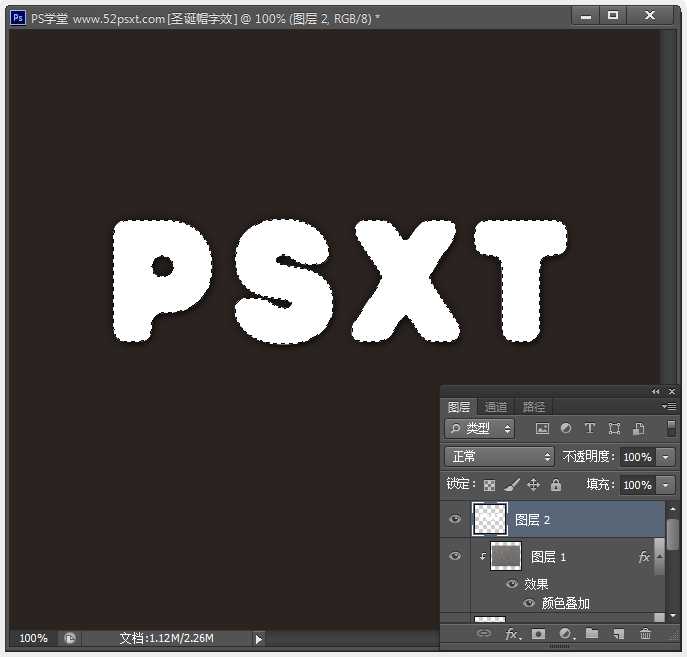
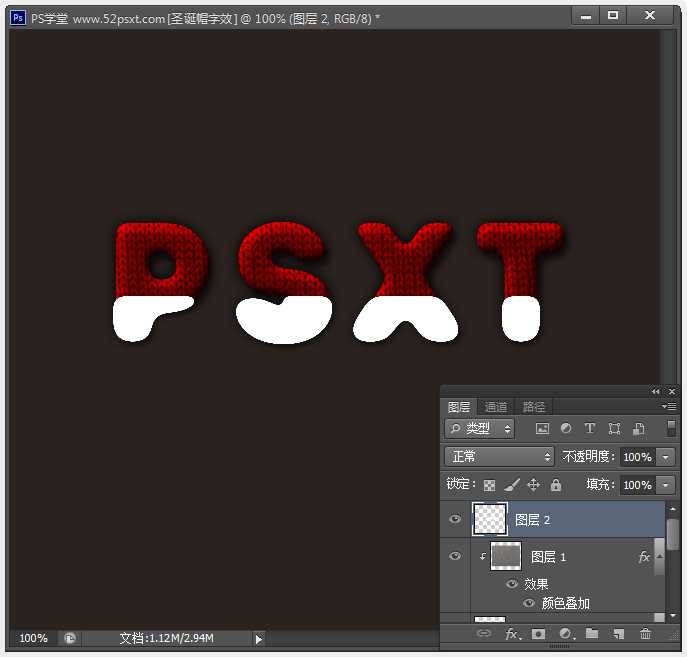
执行‘选择-调整边缘’,数值如下。


非常常见的大气粗体intro字体
灰色针织线路高清图片
毛绒绒的皮毛发笔刷
教程:
1、新建650*600像素的画布,填充背景颜色:#2B2320,双击背景图层解锁。
右键文字图层-栅格化文字,执行‘滤镜-模糊-高斯模糊’。
执行‘选择-调整边缘’,数值如下。