Photoshop制作精致的金色马头
平面设计 发布日期:2025/12/13 浏览次数:1
正在浏览:Photoshop制作精致的金色马头
最终效果

加上文字后的效果。文字教程后续呈现!

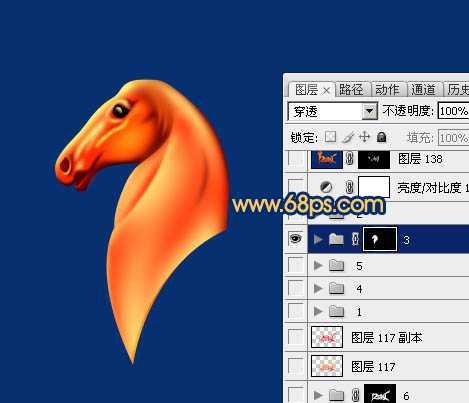
1、先来绘制马头的主体部分,需要完成的效果如下图,用到的颜色非常少:红、黄、暗红,黑色。
<图1>
2、新建一个1000 * 700像素,分辨率为72像素的文件,背景填充暗蓝色。新建一个组,用钢笔勾出马头主体轮廓,转为选区后给组添加图层蒙版,如下图。

<图2>
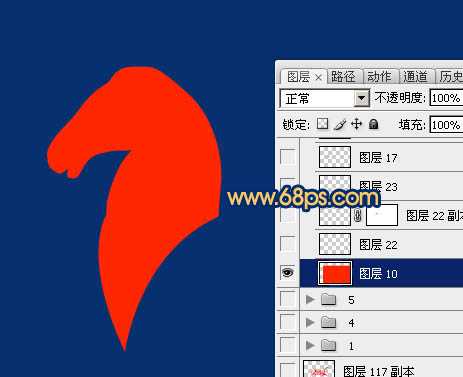
3、在组里新建一个图层,填充红色,如下图。
<图3>
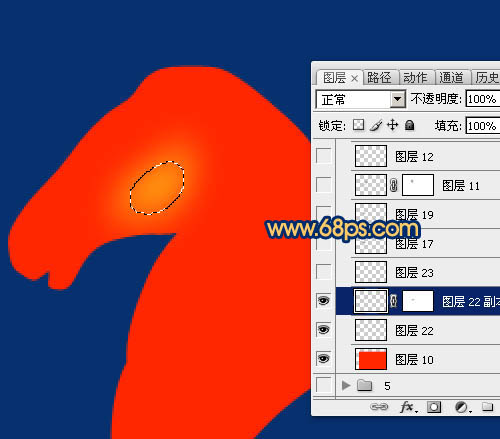
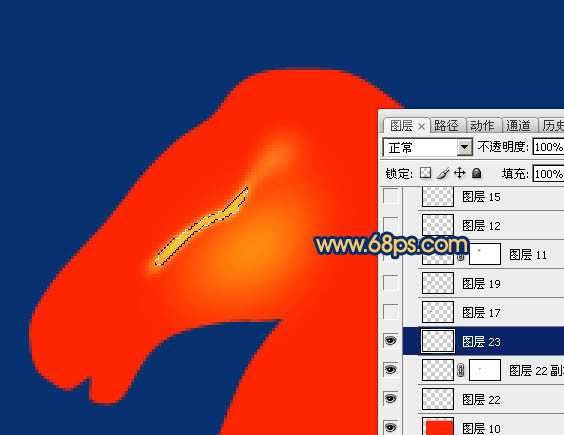
4、新建图层,先给中间位置渲染一点橙黄色高光,图4位置用画笔涂抹,图5需要用钢笔勾出路径转为选区后羽化1个像素填成橙黄色,局部可以用涂抹工具涂抹处理。
<图4>
<图5>
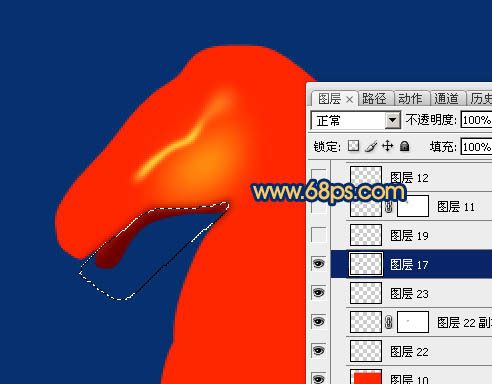
5、新建一个图层,用钢笔勾出马嘴底部的暗部选区,羽化3个像素后填充暗红色。
<图6>
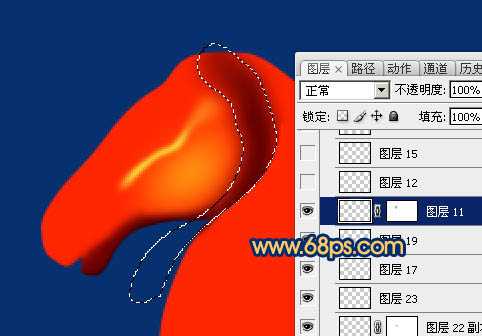
6、新建一个图层,用钢笔勾出头部后边的暗部选区填充暗红色,取消选区后用模糊工具把顶部及左侧部分模糊处理。
<图7>
7、新建一个图层,用钢笔勾出嘴巴部分的暗部选区,羽化1个像素后填充黑色,取消选区后用模糊及涂抹工具把边缘过渡涂自然。

<图8>
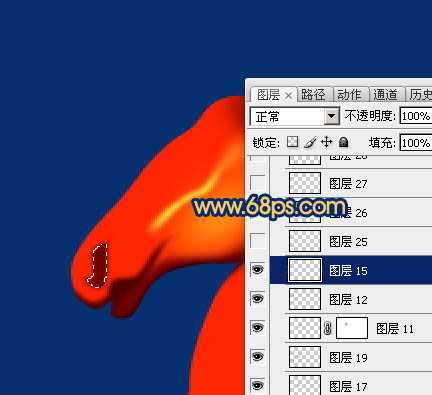
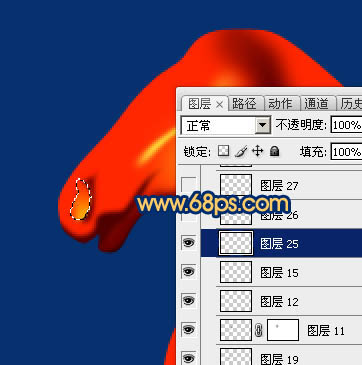
8、新建一个图层,同上的方法制作鼻孔的阴影及高光。
<图9>
<图10>
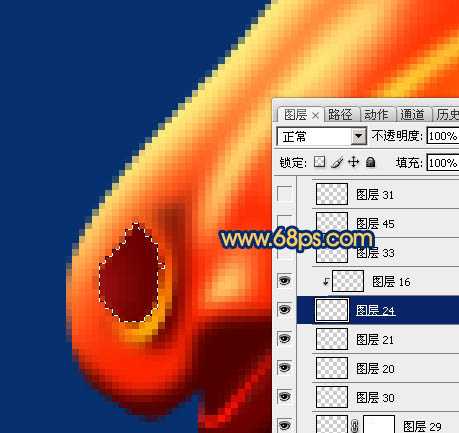
<图11>
9、新建一个图层,给马头顶部增加一点高光,过程如图12,13。

<图12>
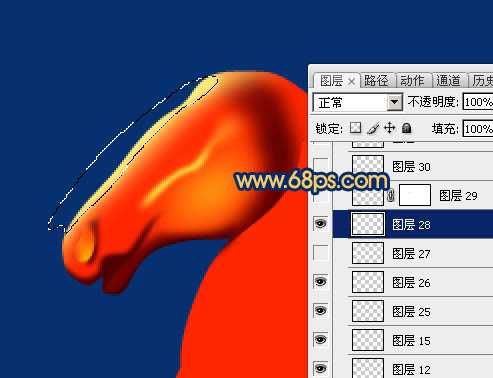
<图13>
10、新建图层,给头部的中间及嘴巴边缘增加一点高光,如图14,15。
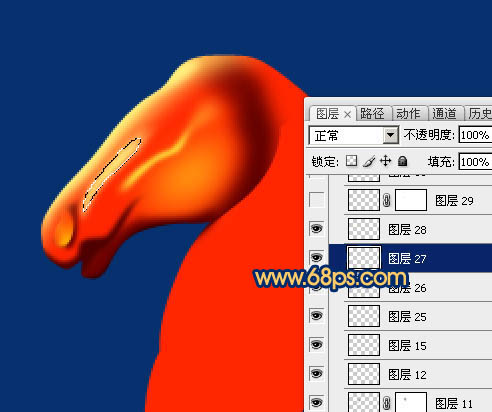
<图14>
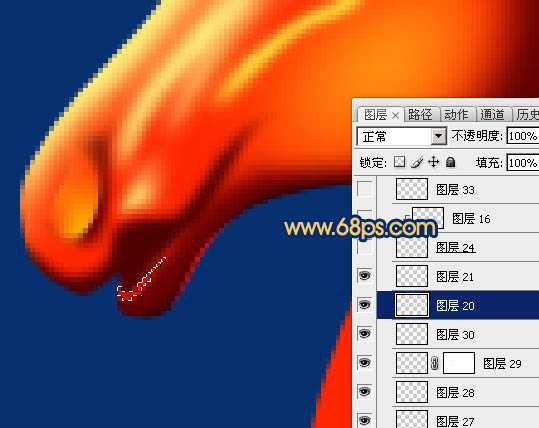
<图15>
上一页12 下一页 阅读全文

加上文字后的效果。文字教程后续呈现!

1、先来绘制马头的主体部分,需要完成的效果如下图,用到的颜色非常少:红、黄、暗红,黑色。

<图1>
2、新建一个1000 * 700像素,分辨率为72像素的文件,背景填充暗蓝色。新建一个组,用钢笔勾出马头主体轮廓,转为选区后给组添加图层蒙版,如下图。

<图2>
3、在组里新建一个图层,填充红色,如下图。

<图3>
4、新建图层,先给中间位置渲染一点橙黄色高光,图4位置用画笔涂抹,图5需要用钢笔勾出路径转为选区后羽化1个像素填成橙黄色,局部可以用涂抹工具涂抹处理。

<图4>

<图5>
5、新建一个图层,用钢笔勾出马嘴底部的暗部选区,羽化3个像素后填充暗红色。

<图6>
6、新建一个图层,用钢笔勾出头部后边的暗部选区填充暗红色,取消选区后用模糊工具把顶部及左侧部分模糊处理。

<图7>
7、新建一个图层,用钢笔勾出嘴巴部分的暗部选区,羽化1个像素后填充黑色,取消选区后用模糊及涂抹工具把边缘过渡涂自然。

<图8>
8、新建一个图层,同上的方法制作鼻孔的阴影及高光。

<图9>

<图10>

<图11>
9、新建一个图层,给马头顶部增加一点高光,过程如图12,13。

<图12>

<图13>
10、新建图层,给头部的中间及嘴巴边缘增加一点高光,如图14,15。

<图14>

<图15>
上一页12 下一页 阅读全文