Photoshop设计蓝色立体效果的圆形八卦图标
平面设计 发布日期:2026/3/5 浏览次数:1
正在浏览:Photoshop设计蓝色立体效果的圆形八卦图标
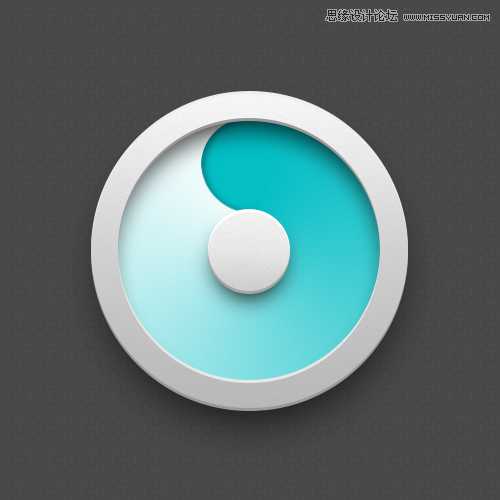
本教程主要使用Photoshop设计蓝色立体效果的圆形图标,经常看到有人问这种圆型icon要怎么做,觉得很有趣稍微思考一下原理,做了个简易快速版本。
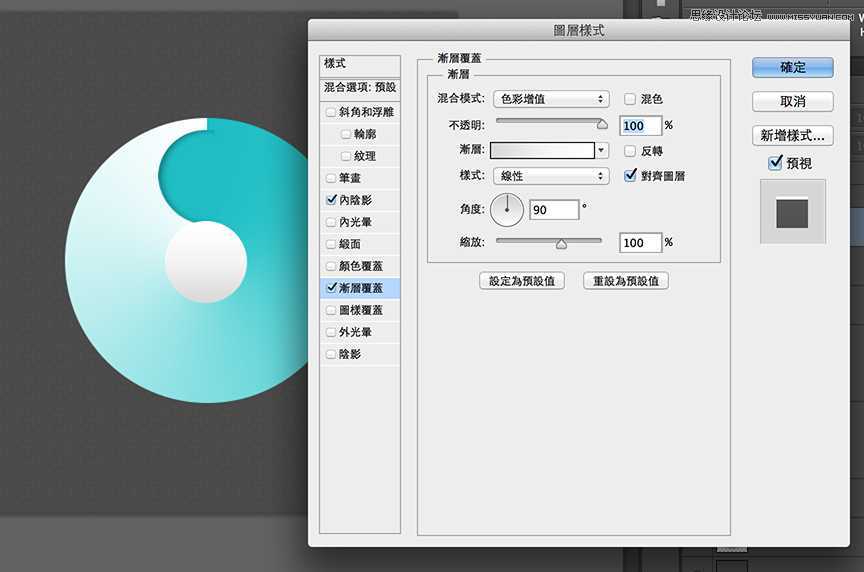
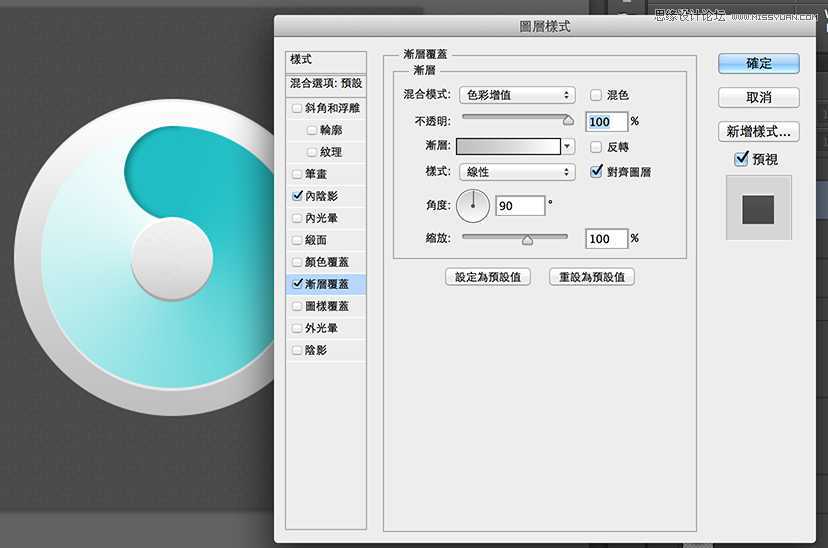
中间的渐层色
画一个圆,设图层样式,角度。

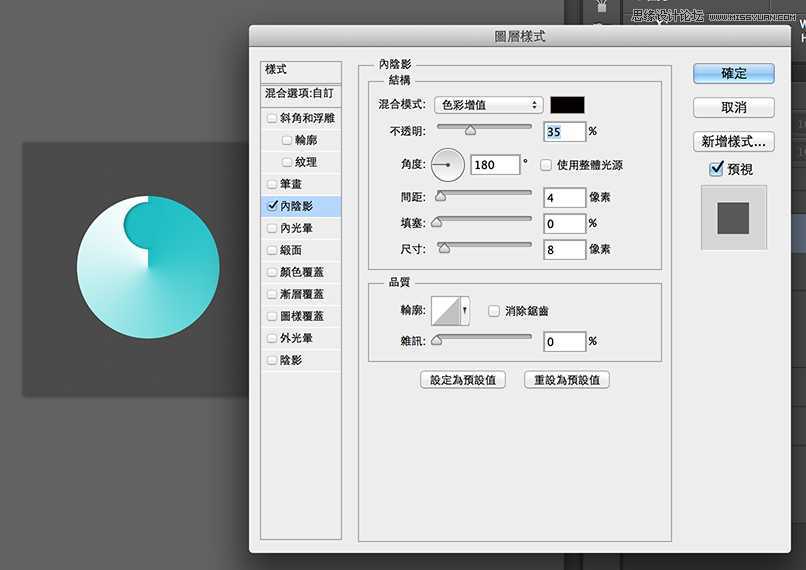
凹进去的部份
其实是用迭的,再画一个半圆,设内阴影。
中心
画一个圆,用图层样式设定,一层就能解决厚度和高光问题。


外框
用形状工具、重迭两个圆画出圆环。同样用图层样式设定,一层就解决厚度和高光。


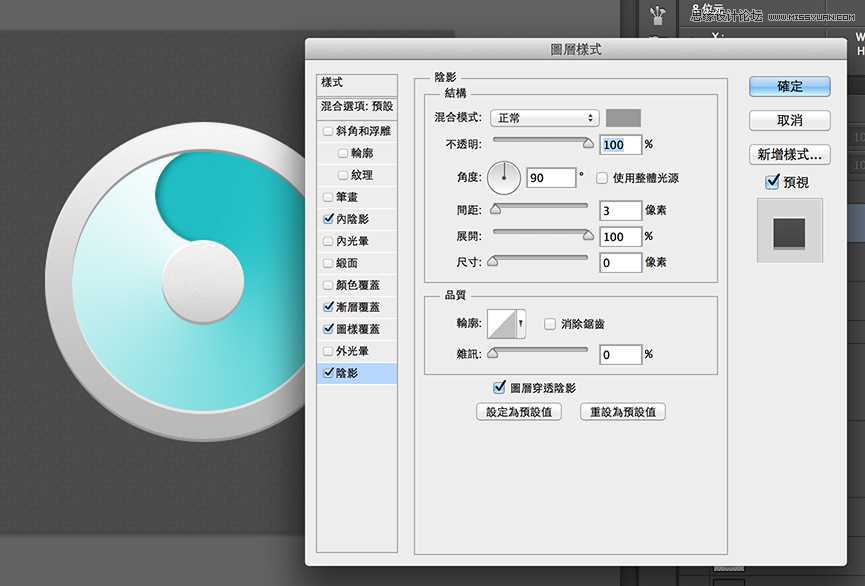
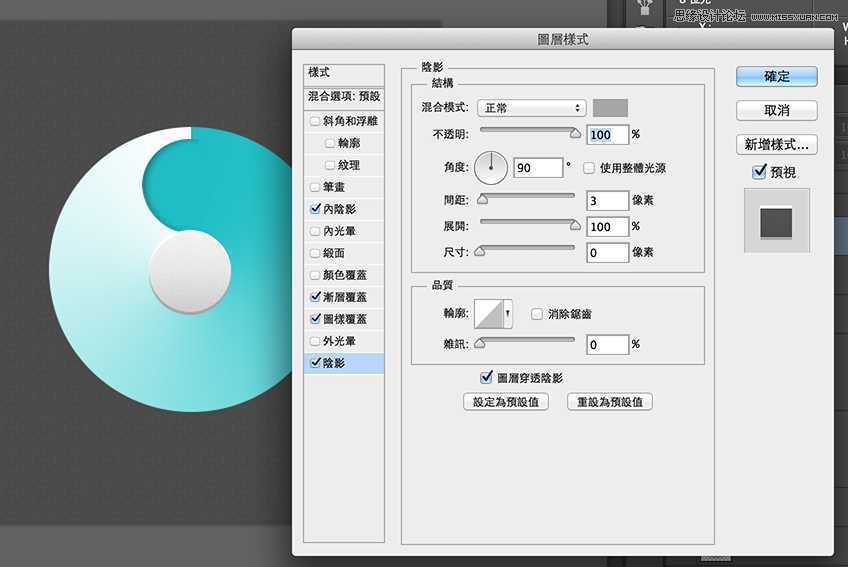
阴影
复制需要阴影的那个图层、高斯模糊,复制一层略缩小85%,调整透明度和重迭部份,阴影会比较立体。共有外框、中心、整体这 3 个部份要处理。


如果这颗ICON小于300x300px 、又不是主力ICON只是个配角、且走扁平化风格的话,用图层样式一层解决高光和厚度是很方便快速的作法。但如果是拟物风就得把这几层拆开独立制作。比较有趣的部份是「角度渐层」,平时很少使用这种渐层方式、明明是凹陷的部份却以迭加一个圆的方式制造假阴影也扭转平时的作图想法。果然多临摹大师作品可以学到很多不同的思维方式。
中间的渐层色
画一个圆,设图层样式,角度。
凹进去的部份
其实是用迭的,再画一个半圆,设内阴影。
中心
画一个圆,用图层样式设定,一层就能解决厚度和高光问题。
外框
用形状工具、重迭两个圆画出圆环。同样用图层样式设定,一层就解决厚度和高光。
阴影
复制需要阴影的那个图层、高斯模糊,复制一层略缩小85%,调整透明度和重迭部份,阴影会比较立体。共有外框、中心、整体这 3 个部份要处理。
如果这颗ICON小于300x300px 、又不是主力ICON只是个配角、且走扁平化风格的话,用图层样式一层解决高光和厚度是很方便快速的作法。但如果是拟物风就得把这几层拆开独立制作。比较有趣的部份是「角度渐层」,平时很少使用这种渐层方式、明明是凹陷的部份却以迭加一个圆的方式制造假阴影也扭转平时的作图想法。果然多临摹大师作品可以学到很多不同的思维方式。